Sunday, 25 February 2018

Dining in style - the Florence Dress

Last Autumn, Gareth and I both celebrated 'big' birthdays. My family arranged a weekend away for us, including train travel, babysitting, luxury apartment and a voucher for a Michelin starred restaurant. The trip came around last week and naturally, this was an excuse to plan a new outfit. I joined the Sew Over It PDF club at the start of the year as part of my mission to get my sew-jo back. I used my joining discount on the Florence Dress pattern, a 70s style maxi dress with button-front, mandarin collar and elasticated waist.  Having decided to make this dress for our trip to Wilks in Bristol, I ummed and ahhed about fabric choice for ages. I had seen an amazing retro print crepe but decided against it in the end - it was fab but there was the risk of looking like I was in fancy dress. In the end, I opted for some lovely floral crepe from the Sew Over It online fabric shop. 

The size of the pattern pieces meant it took even longer than normal to stick the PDF together. If I hadn't been in a rush to get this finished, then I would have used the print shop option and would definitely use that for my next PDF from the club. The dress is quite straightforward to sew, with the buttons and placket probably the only slightly tricky aspect due to the fabric I used. I can't bear clothes to be too tight on the waist (especially if I know I'm going out for a big meal!), but I think I used too much elastic around the waist and as such, it isn't as flattering as it could be (I'm pulling it together at the back in the picture below). I ran out of time to alter it, but I will do this before I wear it again. The length is good for me, and I think I will make another version in brighter colours for the Summer. It's really comfy to wear and very similar to something I saw in a high street shop the other day, which is always pleasing!


We had an amazing time at Wilks - go if you ever get chance!

Sunday, 11 February 2018

Victorian style - the Bloomsbury Blouse

I realised recently that I haven't made any smarter tops to wear with jeans for ages (partly because my jeans were pretty tight post-Christmas....).  Thankfully, I've lost most of the mince pie weight, so I decided to tackle the second of my 'Make Nine challenge projects. I bought the Bloomsbury Blouse pattern from Nina Lee's stall at GBSB Live and also bought some beautiful cotton lawn from Doughty's to make it. I had planned to make it back in the Autumn but ran out of time. Once I decided to get on and make this, I went to Abakhan to get some buttons and cut out the fabric that night. 

I decided to make the version with the narrower ruffles, and I had been tempted to leave out the neck ruffles completely, but decided to keep them after seeing So Zo's version. There are a lot of pattern pieces because of the yoke and the ruffles themselves. It was nice to tackle a project which felt like a bit of a challenge again. The majority of this project was straightforward, but making, pinning and sewing the ruffles took a long time. I made it in a size 10, but took a smaller seam allowance as I didn't want it to be too tight. I wish I'd kept to the correct seam allowance because it is a bit loose. My Mum had recently made a version of this blouse and advised me to cut the yoke smaller because I am quite narrow across the shoulders. Foolishly, I ignored this advice (I'm sure there's a lesson in this), and the edge of the ruffle sits a bit lower than my shoulders. 

Despite these minor issues, I am really pleased with the blouse. It's on-trend, but really wearable. I have worn it with jeans, but it would also look good worn with a pencil skirt for work. I will definitely be making another version, maybe a sleeveless one for Summer, but will alter the width of the yoke and take the correct seam allowance. This was the first Nina Lee pattern I've made, and I really enjoyed making it. I've got my eye on the Southbank Sweater Dress next. 


Friday, 2 February 2018

A Winter Warmer - the Blackwood Cardigan

At this time of year, my (semi-smart) work uniform consists of dresses, boots and long cardigans, or sometimes jeans, boots and long cardigans. I have a couple of cardies I wear to death and have been on the lookout for a pattern and the right fabric to make some replacements. I came across the Blackwood Cardigan by Helen's Closet and the longer version seemed perfect so I added this to my 'Make 9' list for 2018. Scrolling through Facebook (looking at sewings stuff obvs), I saw some textured, cable knit style jersey by Higgs and Higgs. I have never bought fabric from them before but I had to have this as soon as I saw it. I was delighted when it came - it is heavyweight, so nice and warm and the colour I chose (pale green) was beautiful. 

I could only buy a PDF version of the pattern in the UK, but luckily I had a willing helper (Thomas) to stick it all together (with supervision!).  I was surprised at the number of pattern pieces for a seemingly simple garment, but the extra features such as the hem and collar band make a lot of difference. My overlocker has been playing up for a while - I think it needs to go in for a service but I can't bear to be parted from it. It can finish seams but the stitch is too loose for sewing with, so I decided to make this using a ballpoint needle and zig zag stitch on the regular machine. Because the fabric is thick with a couple of layers, it looked as though it might fray, so I finished the seams with the overlocker as I would do for a woven fabric. 

The instructions were excellent, and I would recommend this pattern to anyone. There are a couple of trickier techniques, but on the whole it's a very straightforward and satisfying project. The longer version took a couple of evenings to sew, mainly because of its size. I am over the moon with the fabric choice - it's so warm and comfy. I'm planning at least one more in another colour. I also think the short version would make a smarter cardigan to wear with a pencil skirt on days I have meetings. 

Here I am wearing it this morning:


Tuesday, 30 January 2018

The Cocoon Dress mark two

As promised, I'm catching up on writing up projects from the end of last year. I've got a couple of exciting projects on the go as part of #makenine2018 which I'm hoping to be able to update on in the next few weeks. In the meantime, I am writing up a make from November. 

I last made the Simple Sew Cocoon Dress back in the Summer. I was really unsure about how it looked, but I got some fantastic feedback. The pattern has been a real hit with loads of versions being shared online. I fancied having another go, but using fabric with more of a drape to make an evening version.  I bought some beautiful viscose from Guthrie and Ghani at the Great British Sewing Bee Live which I decided to use for this. 

The dress really is a very simple project and can be completed in a couple of evenings. I was pretty distracted while making this and ended up putting the pockets on inside out. Given that no-one can see them, I opted to leave them that way to save time!  It was slightly trickier working with this fabric, but I think it was a good choice for the style. It definitely feels more of a 'dressed up' dress than my Summer version, and I have worn it loads. The style makes it so comfortable, and it's very forgiving if you have been out for a big meal!


Tuesday, 2 January 2018

The Birthday Shirt (and my 2018 sewing resolutions)

Happy new year! It's back to reality for me today after all the Christmas celebrating (and eating), and I've got a renewed focus on stitching and blogging for 2018. I was pretty lax with writing about things I had made during the second half of last year. As a result, there are lots of projects that I haven't blogged about yet. I spent November and December in a blur of Christmas present making, and didn't even stop to take photos, so I'm starting this year with a project I made back in late October. 

Gareth had a big birthday back in November (6 weeks after mine) and we bought each other a trip to Berlin to celebrate. I wanted to make him something special and landed on the idea of printing fabric with his DJ logo (His moniker is CheekyDJ).  I had seen other people share pics of fabric they had printed using various websites and found the Prinfab website following an online recommendation. The site was really easy to use and I was delighted with the quality of the fabric when it arrived. 

I opted for a negroni shirt for him as the fit and style is similar to shirts he has bought previously and he still wears the whale print one I made earlier in the year. I'd forgotten quite how much work is involved in making a shirt, but it is really satisfying. As I have now made this a couple of times, I found it easier than before, but there are a lot of steps and techniques so it was still a time-consuming project. 

The birthday boy was very pleased with his shirt and wore it when we went out for a special meal in Berlin. It was pretty much the trendiest restaurant I have ever been to, so I was gobsmacked when the waitress said that she liked Gareth's shirt. When he said I'd made it, she asked me if I was a fashion designer - best compliment EVER!


I've signed up for the #makenine2018 challenge in an attempt to push myself further and also to step out of my comfort zone, both in terms of sewing and style. I will update my progress on here. 

Saturday, 11 November 2017

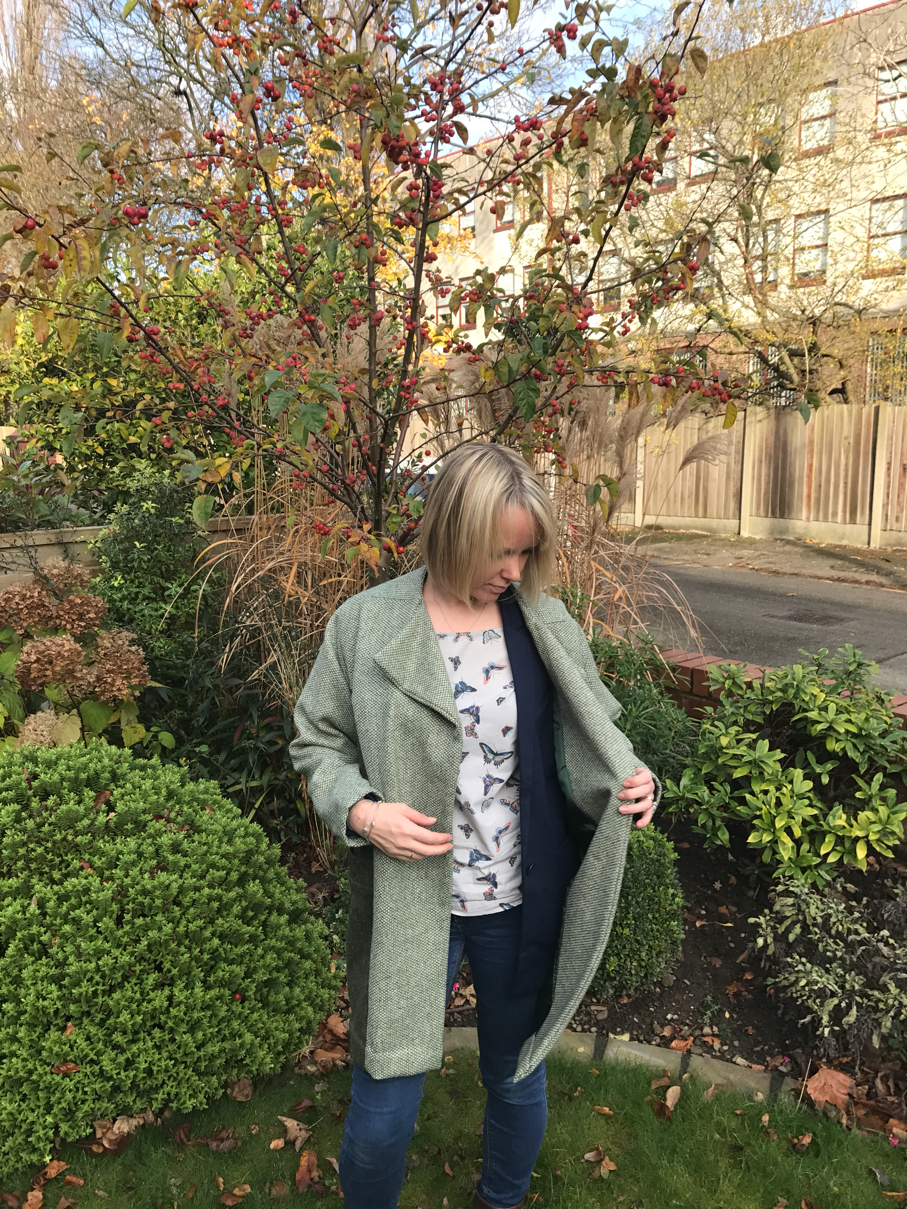
Wrapping up warm - the Gaia coat

I've been thinking about making a coat for a couple of winters now. When I saw the newly-released Gaia coat from Named Clothing, I knew this would be the year I would finally take the plunge. I bought the pattern as soon as I saw it - it was exactly the kind of coat pattern I had imagined myself wearing. Luckily, that was a week before GBSB Live so I was able to buy fabric for it there. Coating and wool fabrics were definitely a theme for a lot of the stalls there, I really was spoilt for choice. The coat has two main outer fabrics and is fully lined. I opted for British-made wool fabric from Fabrics Galore in different shades of green. 

This was definitely one of my most ambitious projects to date. There were so many pattern pieces that it took all my sewing sessions (which are admittedly limited to nap-times and evenings) across a whole weekend. The first thing I conquered was the lined pockets with pocket welts which I was ridiculously proud of. 

I really took my time making this coat as it included a lot of new techniques and the fabric wasn't cheap. Overall, the instructions were OK, but aimed at people with a reasonable amount of experience. There were many times I had to re-read or even go freestyle to work out how things should come together. 

I am really pleased with the finished coat. It is a very loose fit, but that is deliberate (and means I can layer with cardigans). There are a couple of things I'm not 100% happy with - the collar doesn't sit as flat as I would like it to and it's not as warm as I had hoped it would be. Next time I make a coat, I will choose a heavier coating fabric or line with interfacing. 

Here are a few photos:


Monday, 30 October 2017

The 'Cocktail' dress

I went to the Great British Sewing Bee live back in late September, and what a fabulous day out it was. We attended a workshop on professional finishing techniques, where even Mum learned some new techniques, saw lots of stars of the show and were in heaven with stall after stall of beautiful fabric. I was very sensible and wrote a list of all the fabric I needed before going - and I almost stuck to it! Towards the end of the day, I spotted some amazing cocktail print cotton lawn at the Sew Me Something stall and just had to have it!

A few weeks later, I was due to celebrate a 'big' birthday and decided I needed a new dress for the many celebrations I had planned. I wasn't sure what pattern to go for, but knew it had to be made from this fabric. In the end, I decided to keep it simple with yet another Bettine Dress from Tilly and the Buttons. I had a few meals out planned and the casual style of the Bettine combined with this fabric seemed perfect for a variety of events. 

I ended up making this very last minute, so opted for the plain option without pockets or sleeve tabs. I haven't made a woven Bettine for a while (the last two were stretch), and I loved the simplicity of putting it together. It's also a while since I have sewn with cotton lawn and I had forgotten what a pleasure it is to see with (and how comfortable it is to wear). The whole thing only took an afternoon and an evening and I even had enough fabric left over to line a dark denim Agnes Bag (not blogged).

I've worn the dress four times now, and I love it!